homeaboutresourceslinkscontributorscontact
Showing posts with label paper art. Show all posts

Tuesday, 4 August 2015

3W: Crystal Wager


what: paper installations, drawing and printmaking 
why: neon colours! Her installations draw you in visually and then when you look deeper the connection between her drawn and print processes and the development into sculpture makes them perfect to show students how to evolve from a drawing in an exciting manner! 

Wednesday, 28 January 2015

Digital: Fragment App

This academic year has flown by and like many of you in Further Ed I can't believe we're about to start the exam unit! With this in mind I realised my attention lately has been on the job and that it was about time I focused on sharing ideas that I've discovered on my journey.


Some of you may have already heard of this App but it is literally amazing.. and I am a teeny bit jealous that it wasn't invented when I was studying art and design. Fragment App first came to my attention when it was iTunes 'App of the Month' and my colleague shared it with me. At first glance, I knew it would be some sort of photo editing software but I didn't realise the potential it had in the classroom!

Straight away I tested the software with some of my student's work (above image) and discovered that it was perfect for adding geometric patterns and shapes to images. I was instantly hooked and saw how it could revolutionize the development and experimentation of my student's work. 

My students have responded to the App really well and I would say that in some cases it has saved their project work. Some of my students have created entire projects using the App and it is a brilliant way of getting digital work into a project quickly without the hassle of Photoshop.


Here are some of my suggestions as to how you could use the software in your classroom:
  • Initial Responses: Engaging students with different ways of how to view their images - especially those who are most suitable to abstraction!
  • Experimentations: Drawing, painting, collaging, weaving, layering, double exposures, etc.
  • Sculptures: Print, cut, images and turn into unique photographic sculptures.


Fragment App is available through the iTunes store and works on iPhones/iPads/Androids as well as desktops! The App does cost - but it's definitely worth the couple of pounds and if you have a department account then you only have to pay for it once.. yay!

So, what are you waiting for? Deliver it as an exciting new technique to your students over the next few weeks and make their exam project stand out!

- Kirsty ❤

Wednesday, 5 November 2014

lesson idea: Paper Cutting

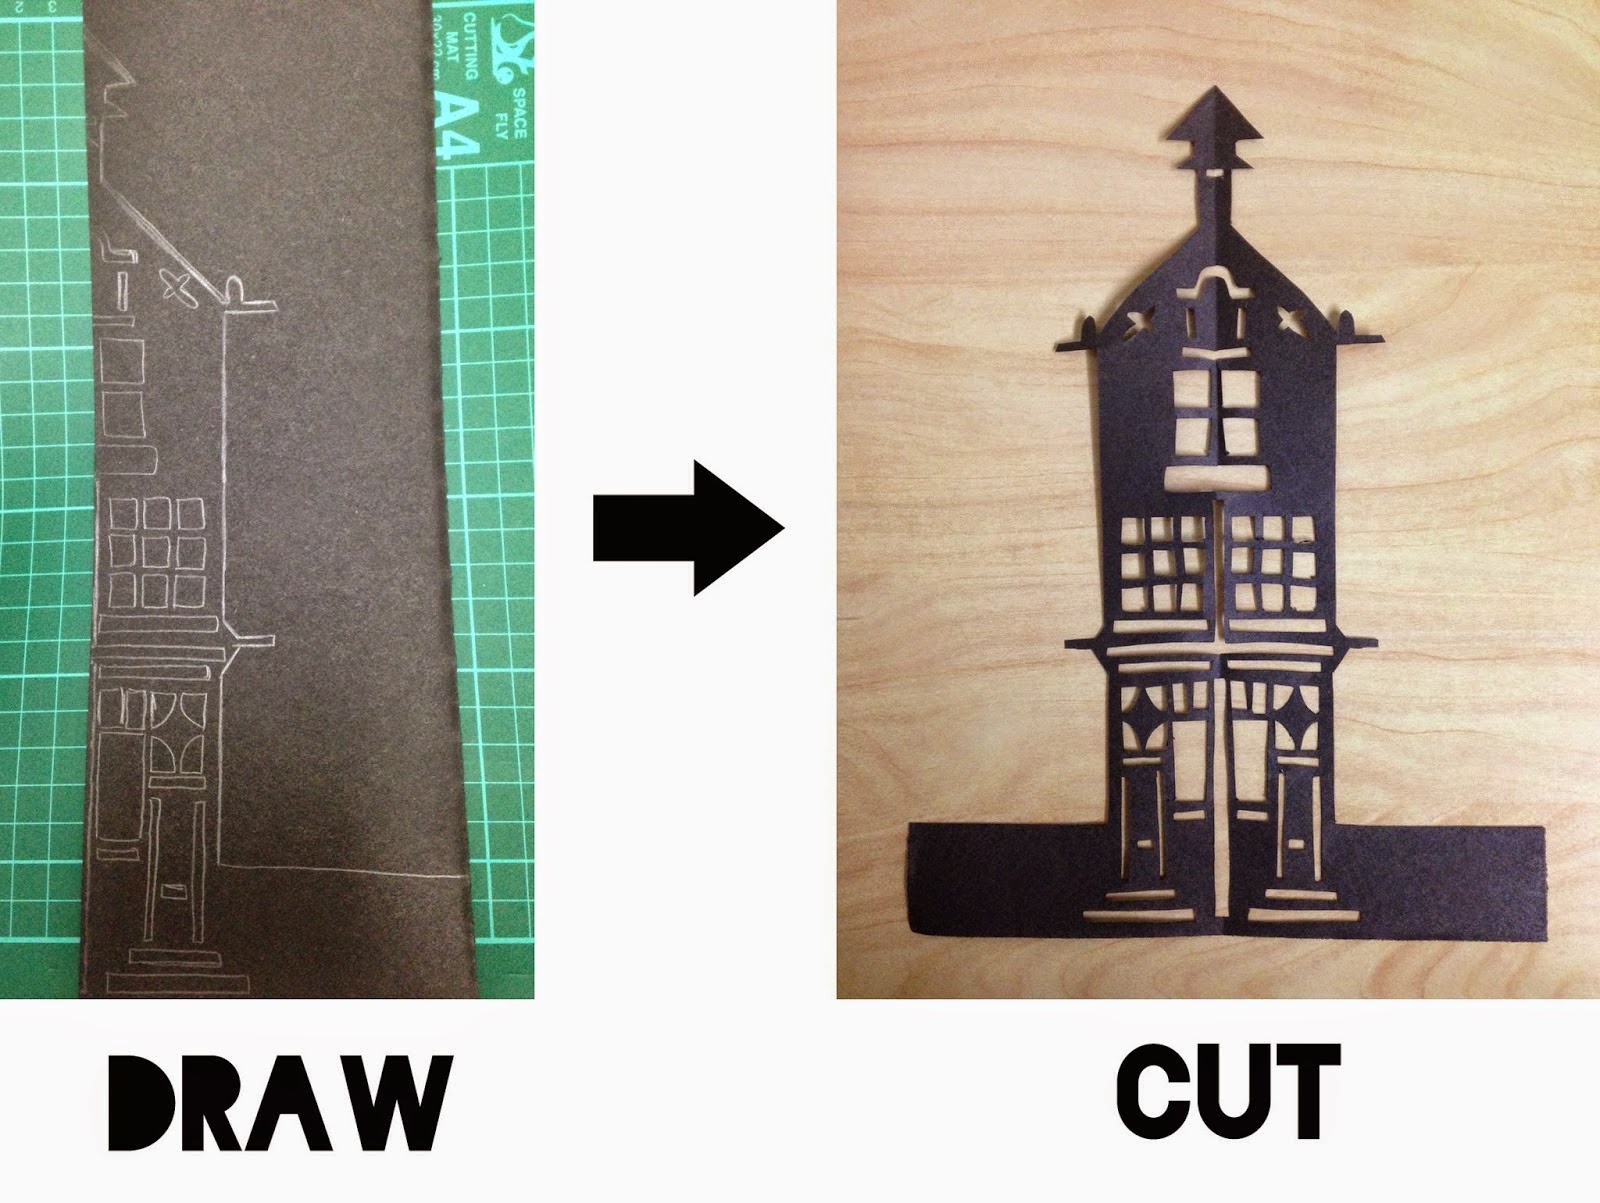
This morning I had an awesome lesson with my year 9's so I thought I would share it over here on I heart teaching art! We've just started an altered book project and to ease them in to manipulating paper I wanted to start 2D to build up their confidence. Both me and Kirsty have done a lesson on paper cutting recently but her's was aimed at year 12 - it's a great lesson that can be aimed at a range of levels you just need to play around with the level of skill and subject matter. We focused on buildings for our cuttings. 

Starter: We watched a quick 4 minute clip of Rob Ryan talking about his work (you just can't do paper cutting without referring to him can you?! and the students loved it). I gave the students a very brief worksheet to fill in as we watched the video and afterwards discussed their opinions of the art work and how it had been created.

video clip: This is the clip that I selected, but there are a ton of different videos so you can easily adapt this to select a clip more relevant to your class! 


Worksheet: download a copy, HERE.


Demonstration: I then demonstrated to the group how to create a symmetrical paper cut by folding the paper in half and drawing one half of the image. I found it was good at this stage to go over 'anchoring' the cut out areas and colouring in the sections that you wanted to cut out to make sure that it worked. 


Main: Students will design and cut their own design based on buildings. I also provided my class with a range of examples (see below) so that they could get inspiration and if needed, copy sections of existing designs - for me this lesson was about learning the technique more than creating the design, that will come later! Once the students have got started it's best to go round and check designs, give guidance on how to cut and if there are any mistakes a few quick 'cheats' with some tape to fix it can always help!

Extension: For my higher ability learners, once they completed a paper cut (in super speedy time!) we discussed ways to make their existing design more complex OR began a second cutting this time working with a flat design rather than symmetrical and for the very advance students introduced typography (must be done back to front!) and shapes surrounding the design.


Plenary: If you have access to an old OHP then you can celebrate (woo-hoo!) cause it now has a super cool function! We gather around the OHP to exhibit our final paper cuts and as each student showcased theirs we ooo'd and aahh'd (as its bonfire night) and they discussed either a pro or con of paper cutting!

If you do have a go at this lesson as always we'd love to see the results!
- Claire ❤ (& Kirsty as I pinched some of her resources for my lesson and this post!) 

Wednesday, 13 February 2013

lesson idea: paper dress


The last few weeks have been crammed full of inspiring activities in my A Level lessons to get my students hooked and engaged with their new project - the exam unit! On Monday I set my AS Textiles students the challenge of creating a paper dress. The exam theme is 'Covert and Obscured' and my students been researching the work of fashion designers and artists who use recycled materials to create garments and accessories, often creating pieces so beautiful that the recycled materials used are almost unrecognisable. To begin the lesson we looked at the work of designer Gary Harvey alongside the 'Junk Fashion Show' put together by fashion students from Krakow's school of Art and Fashion design.  

I then gave the students a pile of newspapers and they looked to origami, simple folding techniques and experimenting with heat transfer onto paper to create a series of small experiments individually. We stopped intermittently to discuss processes that were working well and began planning what could be created to construct the dress. The students then worked together to dress the mannequin using staples and tape to hold the experiments together. I think the finished result is beautiful and it showed them that an artistic fashion piece can be made quickly and with limited materials, whilst encouraging them to explore the maximum potential of those materials! 

I love that there is plenty of scope to use this approach to add deeper meaning in a range of different directions depending on your choice of contextual link. You could look back to the 1960s when the paper dress was a desirable disposable fashion pieces, discuss pieces that make a social comment like Gary Harvey's or look at contemporary fashion which uses orgami as inspiration, blogger Ajurette Maga has put together a wonderful two part blog post with a brilliant collection of designers (part 1 and part 2) for this! 

As always let us know if you have a go at this after reading or get in touch and share if you've done a similar project!

- Claire ❤

Thursday, 18 October 2012

lesson idea: Maurizio Anzeri inspired embroidery


I'm currently doing a self-portrait project with my BTEC Level 2 Art and Design students as part of Unit 2: 2D Mark-Making. We're in the experimental stage of the project so we've been trying lots of different techniques but today we looked at textile approaches. The lesson worked really well so I thought I'd share what we did... 

Starter: How many marks can you make with a pen? 
I was inspired by this blog post by illustrator/artist Jill Bliss and now whenever I'm doing something mark making related with my students I use this as a starter! I like to give a good 10 minutes for them to really doodle and get into it with just the simple aim of making as many marks as they can with just their pen. If I can I like to join in and do my own on the white board too! 

Main: Maurizio Anzeri inspired embroidery
materials needed:
vintage photos photocopied onto heavy weight paper
needles
embroidery thread
scissors
I made 2 copies of each photograph so that the students could have one photo for translating the marks they'd made in the starter onto the photograph using a pen and the other to stitch on to, this helped them plan which areas they wanted to place their marks in. We then discussed the work of Maurizio Anzeri and afterwards got stuck in stitching for the rest of the lesson! I think it's best to let them be experimental with the marks they make but it's also a good chance to highlight and explain a couple of simple embroidery techniques that they could use and highlight where Maurizio Anzeri has used them on his work. I did it up on the interactive white board... 
Plenary:Class Exhibition
A chance to showcase what they have done and discuss what else they could do to enhance the image further - embroidery is a slow process so they will be able to take away the work and continue if they are really keen on the technique or want to extend and push themselves further! 

My students really enjoyed sewing and it was nice to have a lesson where we could all sit down and have a conversation at the same time as working. We discussed everything from the sort of sewing they'd done in school to imaging people looking back at photographs of us in years to come and them looking as old fashioned as the photos we were using do to us! As always if you try the lesson, or something similar, we'd love to hear from you about how it went!
- Claire ❤

Monday, 1 October 2012

3W: Elizabeth Lecourt


what: dresses made from maps aka Les robes geographiques
why: we love a good map! Or perhaps it's more that we love anything art-related that uses maps, perhaps they are what we call the ultimate collage material. Anyway, Elizabeth Lecourt constructs these beautiful garments from beautiful maps and we think that her work is wonderful - we're also quite pleased she's a Londoner so we'll be keeping are eyes peeled for upcoming London exhibits! You should also check out her  her drawings and handkerchiefs quirky and also beautiful.

Thursday, 13 September 2012

lesson idea: paper installation


Okay, so I think my favourite craze in the world of graphics right now is paper art installation. It's insane the amount of wonderful work that's out there and I can't get enough of it! Our pinterest board is fast filling up and every time I see a new piece I'm in completely awe at the skill level involved in creating this work and it gets me totally inspired.

So our lesson inspired by paper installation began when we discovered the work of Darcy Prendergast (we've posted about him before!) who recreated the Sydney Harbour out of stationary. We showed our students the video below as a starter....


...and got them to fill in a worksheet answering the following points: how many different materials can you spot in the clip? what is the purpose of the piece? do you like the piece? why? why not? write at least 3 keywords to describe the piece of artwork, after watching it. We then got them having a go themselves seeing what sort of shapes and structures they could create with a single sheet of paper, before getting them collaborating to create a final paper installation! We used the theme of buildings and the final result looked pretty amazing! You can see some photos of it, here. I really recommend giving this a go - it was a great start to the project and it really got the students thinking outside the box about the potential of working with paper and creating work by hand!
- Claire ❤

Tuesday, 28 August 2012

3W: Anna-Wili Highfield


what: Paper sculpture
why: because we love these delicate but realistic sculptures.  Anna-Wili Highfield is a master in paper manipulation working for a variety of private and commercial clients all over the world such as Anthropologie and Hermes. Anna-Wili who studied fine arts, realised her talent for paper sculpture  during her time working for Opera Australia producing entire scenes as a scenic artist. Her pieces are made from cotton paper that is painted and sewn together, with copper pipe which is 'bent and manipulated to create forms reminiscent of line drawings'.

Tuesday, 1 May 2012

3W: André Lima


who: André Lima
what: geometric/origami inspired fashion collection
why: gorgeous collection and we love this images that trend de la creme have put together making links between origami and pieces from the collection!

Monday, 30 April 2012

3W: Darcy Prendergast


who: Darcy Prendergast for Staples Australia 
what: the Sydney Harbour out of stationary! 
why: because it's the Sydney Harbour made entirely out of stationary! Made using 2344 post its, 84 boxes of staples, 361 bulldog clips, 169 paperclips, 107 rubber bands, 132 coloured pencils and more! We used the video below as a starter/introduction to a mini paper installation project - it was great fun! 


Sunday, 29 April 2012

3W: Ana Serrano


what: cartonlandia - paper buildings!
why: incredible attention to detail and use of materials - we cannot believe it's constructed entirely from paper! 

Wednesday, 25 April 2012

3W: Chris Gilmour


what: sculptures made from cardboard 
why: We were in awe when we opened the metro on Monday morning to see these cardboard sculptures! An incredible example of paper construction, also Chris's website includes close up detail and work in progress shots so you can really get an idea of just how much work goes into each piece! Amazing!